상품 이미지 가져오기
https://github.com/Skye7095/react-context-app/tree/master/server
백엔드 내용은 위 링크에 업로드했습니다.
import React, { useEffect, useState } from 'react'
import axios from 'axios'
import Products from './Products'
import Options from './Options'

const Type = ({ orderType }) => {

  const [items, setItems] = useState([])

  useEffect(() => {
    loadItems(orderType);
  }, [orderType])

  const loadItems = async (orderType) => {
    try {
      const baseURL = `http://localhost:4000/${orderType}`
      const response = await axios.get(baseURL)
      setItems(response.data)
    } catch (error) {
      console.log(error)
    }
  }

  const ItemComponent = orderType === "products" ? Products : Options;

  const optionItems = items.map(item => (
    <ItemComponent
      key={item.name}
      name={item.name}
      imagePath={item.imagePath}
    />
  ))

  return (
    <div>
      <h2>주문 종류</h2>
      <p>하나의 가격</p>
      <p>총 가격:</p>
      <div
        style={{display: 'flex', flexDirection: orderType === 'options' ? 'column' : 'row'}}
      >
        {optionItems}
      </div>
    </div>
  )
}

export default Type
src폴더 안에 components폴더 안에 Type.js의 코드입니다.
import React from 'react'

const Products = ({ name, imagePath }) => {

  return (
    <div style={{textAlign: 'center'}}>
      <img
        style={{width: '75%'}}
        src={`http://localhost:4000/${imagePath}`}
        alt={`${name} product`}
      />
      <form style={{marginTop: '10px'}}>
        <label style={{textAlign: 'right'}}>{name}</label>
        <input
          style={{marginLeft: '7px'}}
          type='number'
          name='quantity'
          min='0'
          defaultValue='0'
        />
      </form>
    </div>
  )
}

export default Products
src폴더 안에 components폴더 안에 Products.js의 코드입니다.
npm run start위 명령어를 통해 브라우저에서 웹을 열고 확인하면 됩니다.
여기서 주의해야할 점입니다.
client과 server은 각각 다른 terminal로 위 명령어를 실행해야 합니다.
client쪽만 run start하면 axios가 error뜹니다. 이게 서버쪽에서 작동이 안 되서 그런 겁니다.
서버 데이터 가져올 때 에러 발생시 처리하기
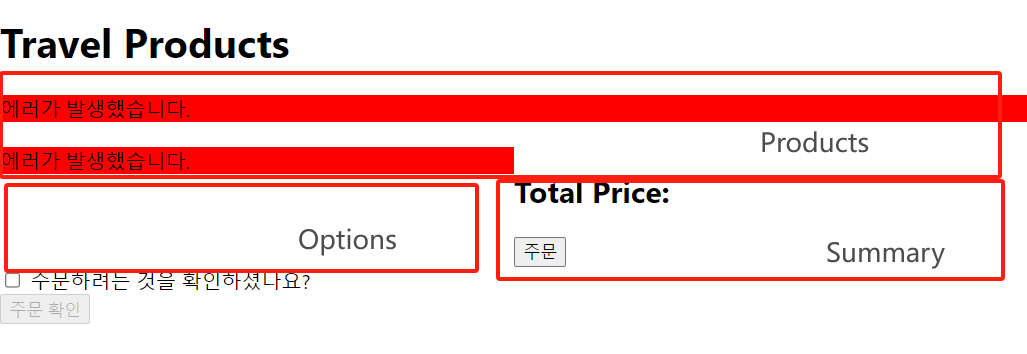
위 캡처처럼 백엔드에서 데이터를 불러오는 과정중에 에러가 생기면 어디서 생기는지 한 눈에 보고 싶어서 에러 메세지로 처리하겠습니다.

src폴더 안에 components폴더 안에 Type.js에 추가한 코드입니다.
error가 true면 ErrorBanner만 렌더링됩니다.
import React from 'react'

const ErrorBanner = ({message}) => {
  return (
    <div
      style={{backgroundColor: 'red'}}
    >
      {message}
    </div>
  )
}

export default ErrorBanner
src폴더 안에 components폴더 안에 ErrorBanner.js의 코드입니다.
위에 Type.js에서 message를 내려줘서 ErrorBanner.js에서 바로 사용할 수 있습니다.
옵션정보 가져오기
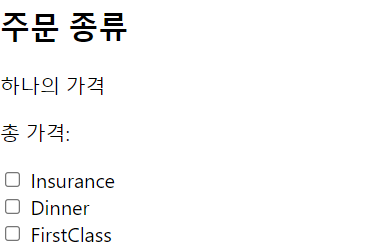
import React from 'react'

const Options = ({name}) => {
  return (
    <form>
      <input type='checkbox' id={`${name} option`} /> {" "}
      <label htmlFor={`${name} option`}>{name}</label>
    </form>
  )
}

export default Options
src폴더 안에 components폴더 안에 Options.js의 코드입니다.
'배워서 따라하는 포플 > react-context를 이용한 앱' 카테고리의 다른 글
| 여행상품 프로젝트(4) (0) | 2023.09.22 |
|---|---|
| 여행상품 프로젝트(3) (0) | 2023.09.22 |
| 여행상품 프로젝트(1) (0) | 2023.09.22 |


